
H-Type Cut-Flange Graphite-Plugged Bushings
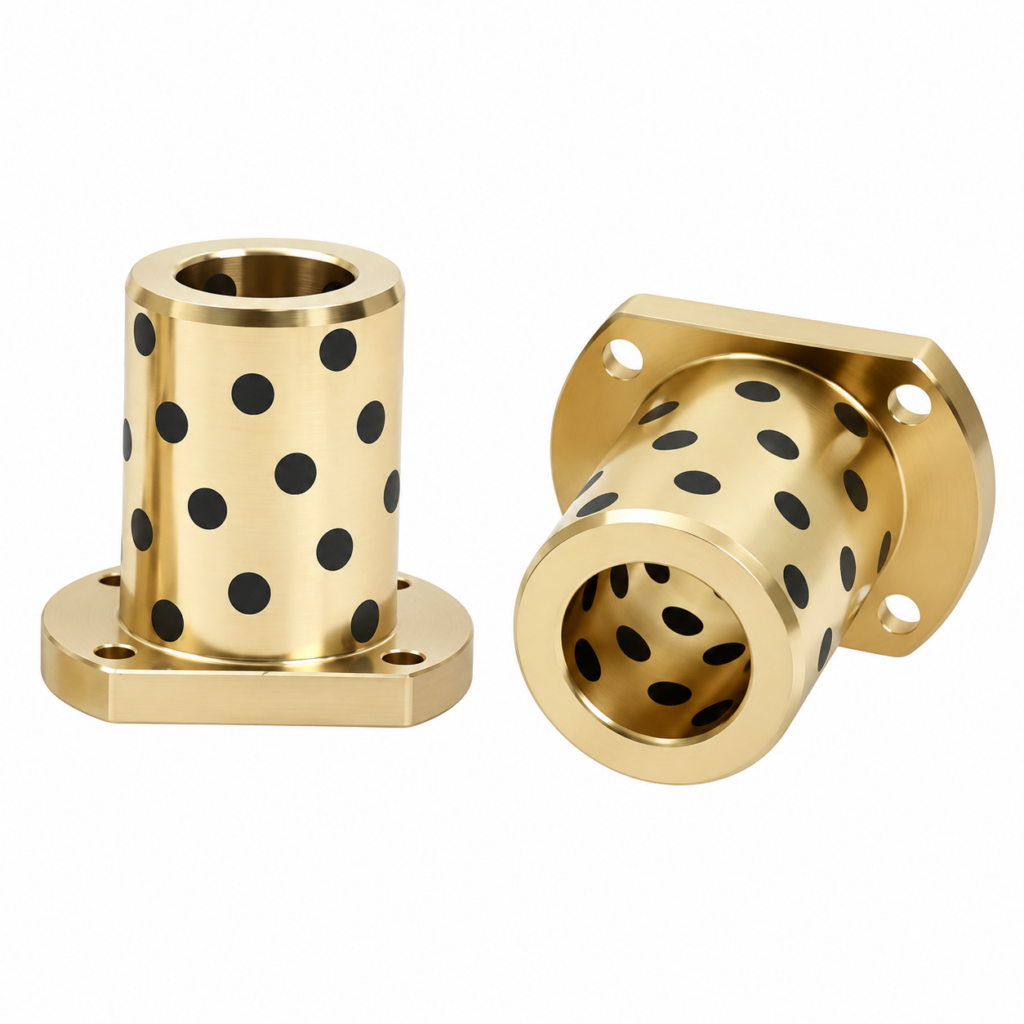
Graphite-plugged copper-alloy bushings with an H-type cut mounting flange and fixing holes. Specify flat spacing, hole orientation, locating fits and operating duty for drawing review.
H-type cut flange with a graphite-plugged sleeve
BONIU H-type cut-flange graphite-plugged bushings combine a solid copper-alloy sleeve with an integral mounting flange trimmed on opposite sides. The flange provides fixing holes for a bolted interface, while embedded graphite plugs form part of the solid-lubricant bearing system.
The illustrated profile retains curved flange edges between the flats. “H-type” identifies this product form on this page; it is not a declaration of a universal dimensional standard or interchangeability with another supplier’s H-series parts. Confirm the complete profile and working surfaces on your drawing.
Cut-edge clearance and hole orientation
A cut flange can be considered where the surrounding assembly restricts the space available for a full round flange. Define the distance across the flats, maximum remaining flange envelope and the position of each flat relative to the bore centre.
Show fixing-hole coordinates or a dimensioned bolt circle together with their orientation to the flats. Include any oil inlet, dowel or locating feature in the same datum scheme. Matching bore size and hole count alone does not establish replacement compatibility.
Review the remaining material around each hole, flange thickness and supporting seat. The trimmed sides should not be assumed to prevent rotation unless they engage deliberately designed reaction surfaces in the assembly.
Dimensions required for drawing review
| Design area | Details to provide |
|---|---|
| Sleeve geometry | Bore, outside diameter, body length, overall length, units and tolerances |
| Cut flange | Distance across flats, maximum flange envelope, thickness and flat offsets from the bore axis |
| Fixing pattern | Hole count, diameter, coordinates or bolt circle, angular orientation and any recess dimensions |
| Seating and transitions | Flange seating face, shoulder radius, edge breaks and clearance to adjacent parts |
| Installed fit | Housing and shaft sizes, locating method, installed bore clearance and alignment requirements |
| Material and lubricant | Alloy grade and standard, graphite formulation, plug layout and intended sliding surfaces |
| Duty and supply | Load, motion, speed, temperature, environment, quantity and inspection requirements |
State whether length includes the flange. For replacement parts, supply the drawing revision and mounting arrangement as well as the loose bushing dimensions.
Graphite lubrication and load direction
The cylindrical sleeve provides the radial sliding interface around the mating shaft. The flange attaches the bushing to its supporting structure. Identify which surfaces move relative to the mating part and which remain clamped.
The photograph shows graphite plugs in the sleeve region. Do not assume the smooth flange face has the same lubrication arrangement as the bore. Any axial sliding contact on the flange needs a separate review of load, contact area, counterface, lubricant and running clearance.
Self-lubricating does not mean inspection-free. Dry-running suitability and any initial or supplementary lubricant depend on the selected alloy, graphite system, mating shaft and operating conditions.
Provide normal and peak loads, rotation or oscillation, stroke where applicable, duty cycle and exposure to contaminants. Use the copper-alloy composition guide for material references; colour alone does not identify the alloy or its capacity.
Mounting and commissioning
- Clean and inspect the housing, flange seat, shaft and bushing. Remove debris and burrs without altering the sliding surface or graphite plugs.
- Orient the flats and fixing holes to the drawing datum. Confirm that the flange clears adjacent components and seats without shoulder interference.
- Use the specified locating fit. Where press fitting is required, apply controlled pressure with aligned tooling; avoid hammering or pressing on unsupported flange edges.
- Secure the flange evenly with the specified fasteners. Bolts should not pull a misaligned sleeve into place. Follow the assembly’s tightening requirements.
- Check the installed bore, alignment and free shaft movement. Follow the agreed commissioning lubrication plan and monitor noise, temperature and wear before increasing duty.
Installed clearance and bore acceptance criteria should come from the actual assembly specification. A generic fit or tightening torque cannot be inferred from the photograph.
Frequently asked questions
Does H-type define one standard set of dimensions?
No universal dimensional standard is declared here. Specify the complete flange profile, sleeve and fixing pattern on the drawing.
Are the flats an anti-rotation feature?
Only if the assembly deliberately uses them against suitable reaction surfaces. A trimmed flange alone does not establish an anti-rotation system.
Can flat spacing or hole positions be changed?
Send the required geometry for review of flange support, remaining material and manufacturing feasibility.
Can the flange face carry thrust load?
Review the axial load path and flange strength. Sliding contact on the face also needs specified lubrication, counterface and clearance.
Is supplementary grease always necessary?
No universal rule applies. Confirm lubrication for the actual alloy, graphite formulation and service conditions.
Request a drawing review
Send the drawing revision, alloy, quantity and operating conditions to sales@boniubushing.com or visit the contact page. Include flat orientation, mounting details and mating-shaft information.
Final material, lubricant arrangement, tolerances, inspection scope, availability and delivery are confirmed during quotation.
General installation reference: OILES plain-bearing installation guidance. Product-specific ratings and fits in that reference do not define BONIU specifications.